Hello.
How can we help you?
Using Checkbox with Prolific
This article outlines how Checkbox can support Prolific in conducting research and running surveys through its advanced tools and features. Checkbox currently serves thousands of customers worldwide, helping them run internal surveys and studies, analyze data, and make strategic decisions based on that data. In addition to built-in survey options, Checkbox offers a variety of channels that enable users to distribute surveys and studies across their user base. This document will highlight key Prolific use cases that can be efficiently executed using Checkbox’s features.
Getting Consent
It’s important to obtain consent to participate in your research from all of your participants (see our 'getting consent' guide for what to include). Participants who don’t consent should be redirected to a separate end-of-survey message.
Here’s how Checkbox does this:
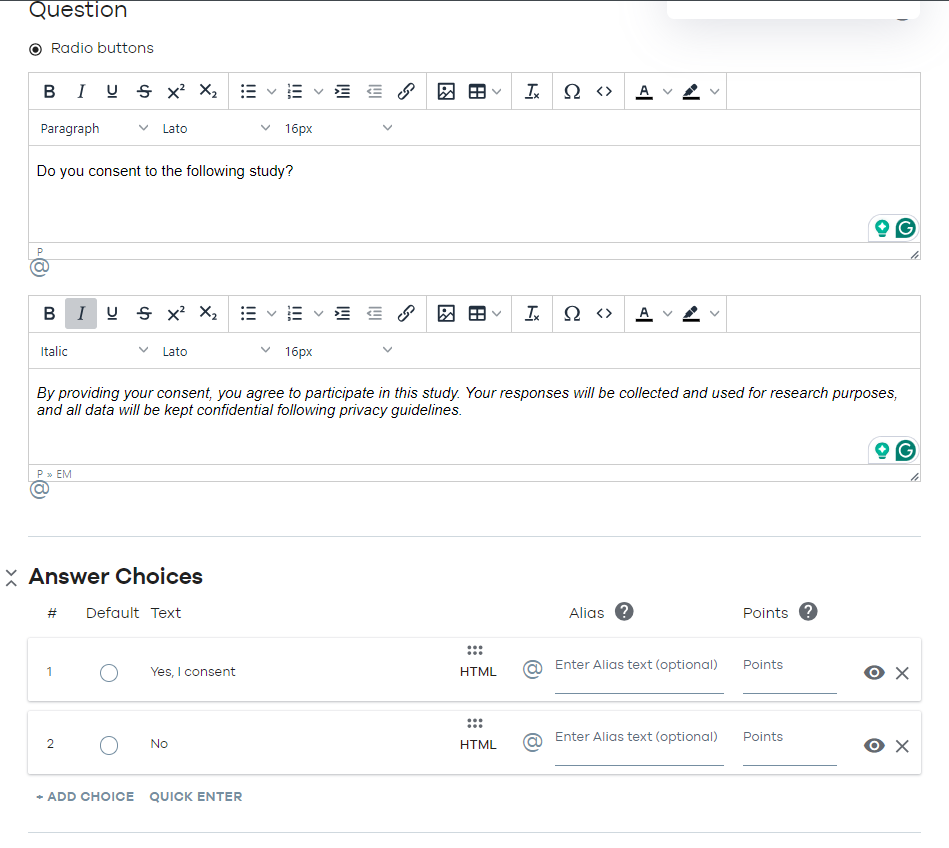
- The consent question can be added on the first page of the study.
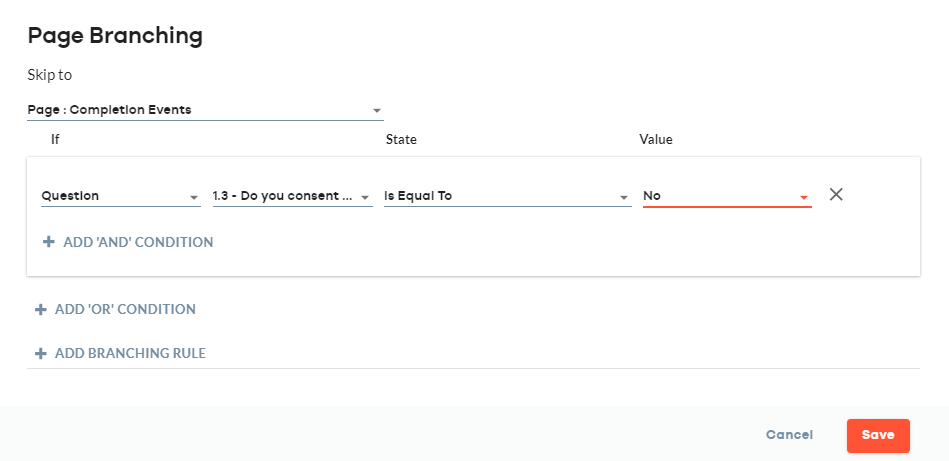
- If the user selects No against the particular question, he/she can be directed to the completion page of the study using the page branching feature:some text
- The branching allows the users to skip to a particular page based on the submitted response against a particular question or on the basis of a profile property of the respondent. In this case, if the user selects No in response to the consent question, he/she will be skipped to the completion page of the study.
- On the completion page, a message item can be added that would only appear if the user has selected No against the consent question. The message would say: “Thank you for your time. Your answer indicates that you do not consent to participate in this study. We appreciate you for your time.”

Recording participant IDs
You’ll need to record participant IDs within your study so that you can match your survey responses to individual Prolific submissions. There are two ways to do this:
Option 1: Automatic recording of Prolific IDs via URL parameters [recommended]
Chckbox allows you to send the data using the variable in the URL (often referred to as Hidden items). The users can use these Hidden items to record the particpants IDs.
1. First go to your study and from there, navigate to Share - >Online via Link and copy the link

2. Go to Prolific, and in the 'Data collection’ section of the study creation form insert your study URL into the 'What is the URL of your study?' box, then select the 'I'll use URL parameters' option. This will add the parameters to your study URL.

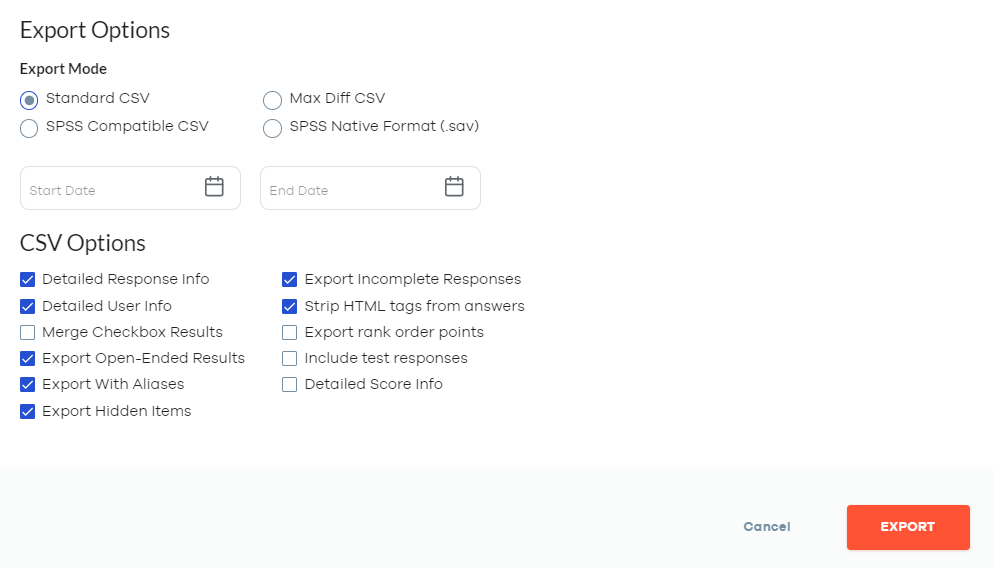
3. To ensure that the participants IDs are exported when you export the study data, navigate to the Responses tab of the survey and click on the “export responses” button on the top right corner of the page.
4. From the menu that appears, select “Export Hidden items” along with the options that best match your requirements.
Find out more about Hidden Items aka Query Parameters .
Option 2: Adding a question to your study
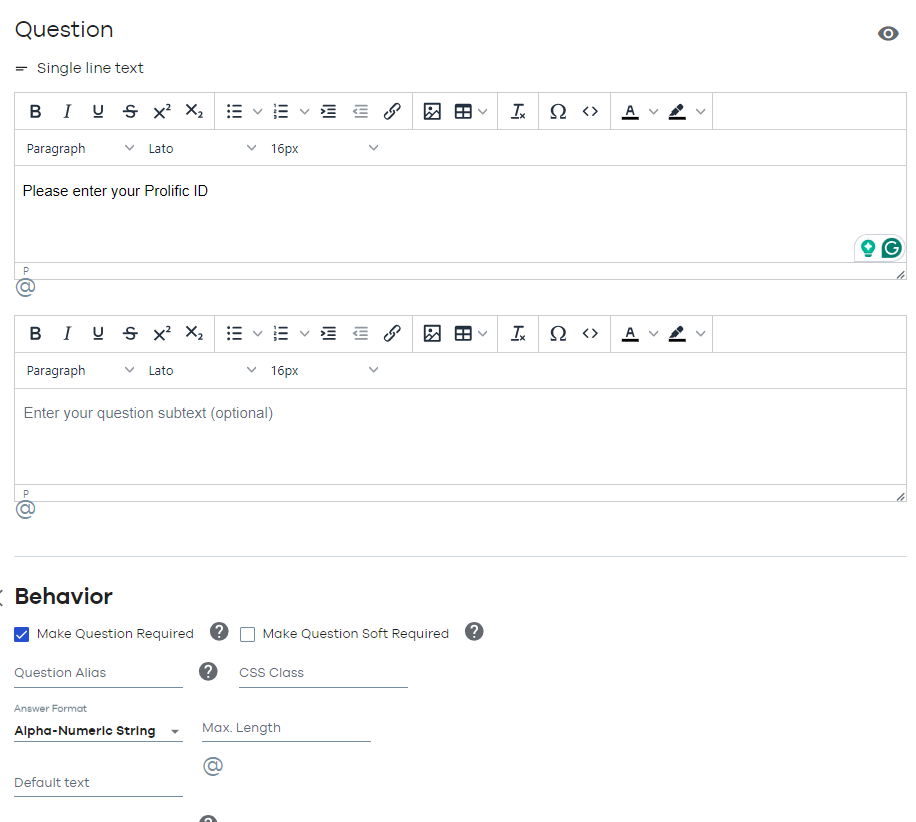
- Add a single-line question to your study that would ask the participants to enter their Prolific ID. Mark the question as mandatory by going to the behaviour section of the question. You can also add validation rules (such as numeric, alphanumeric, or Letters only) to validate the responses.
Validating the prescreeners
The prescreening questions can be asked to validate the responses from the respondents. The validation questions are recommended to be added to the first page of the study with the exact same wording as available on the platform. Using the page branching feature, the respondents can be directed to the end of the survey if their responses are not aligned with the requirement.
Redirecting Participants back to Prolific upon completion
Once the participants have completed the study they can be redirected back to the Prolific page. Here are two ways this can be achieved using Checkbox.com.
Checkbox allows the users to redirect their respondents with the help of the action items that can be added to the completion page of the study.
- Go to the completion page of the survey and select the option of “Add action item”. From the menu that appears, select “Hyperlink/redirect”.
- You will now be displayed options of how you want to redirect the respondents:some text
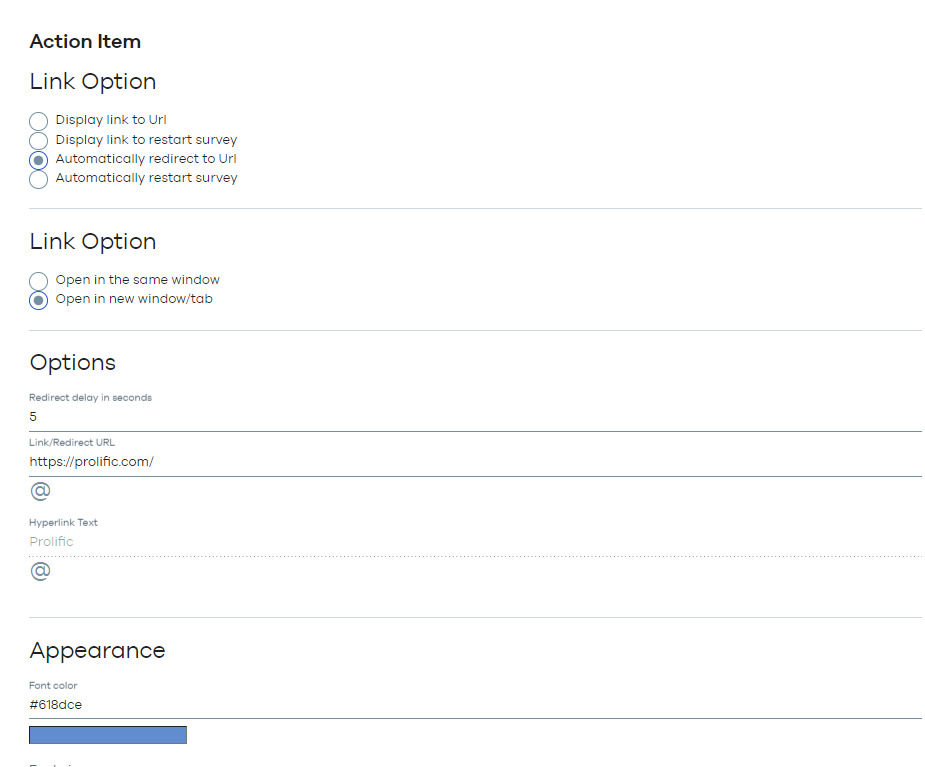
- Automatically redirect to URL
- Provide a URL that they can click on to move to the respective page.
In addition to the 2 options above, the users can also add a code to their studies that can be displayed at the end of the survey which particpants can copy and paste to their Prolific page.
1. Automatically redirect to URL
Specify the delay (in seconds) to redirect to the URL and enter the URL that you wish to redirect the users to.
2. Providing a URL that the respondents can click on to reach a particular page
Provide the URL that you want to redirect the users to along with the Hyperlink text.
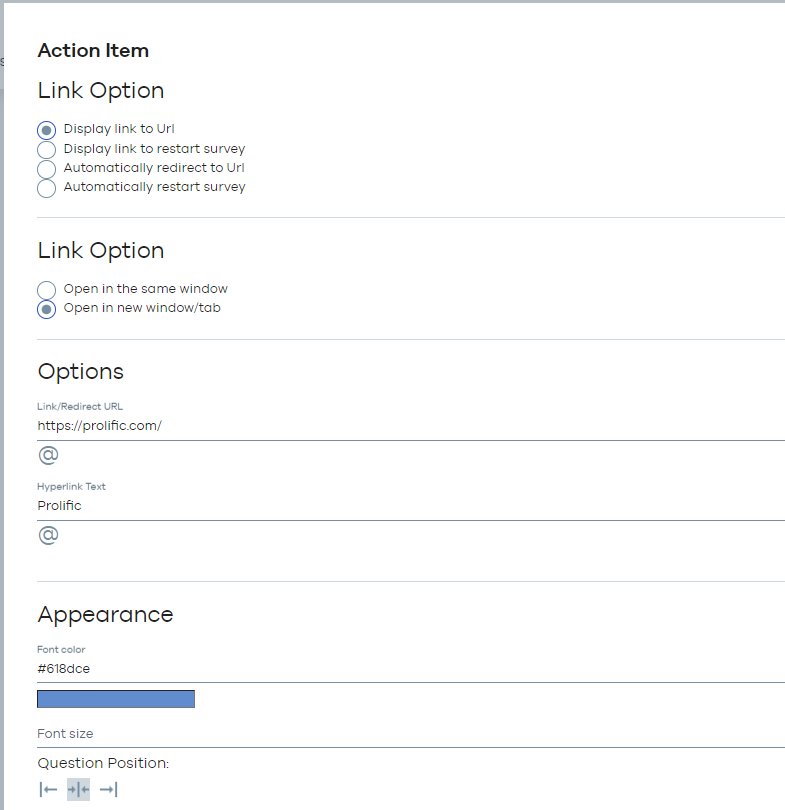
You can also adjust the appearance in terms of the font colour, font style and the alignment of the text.
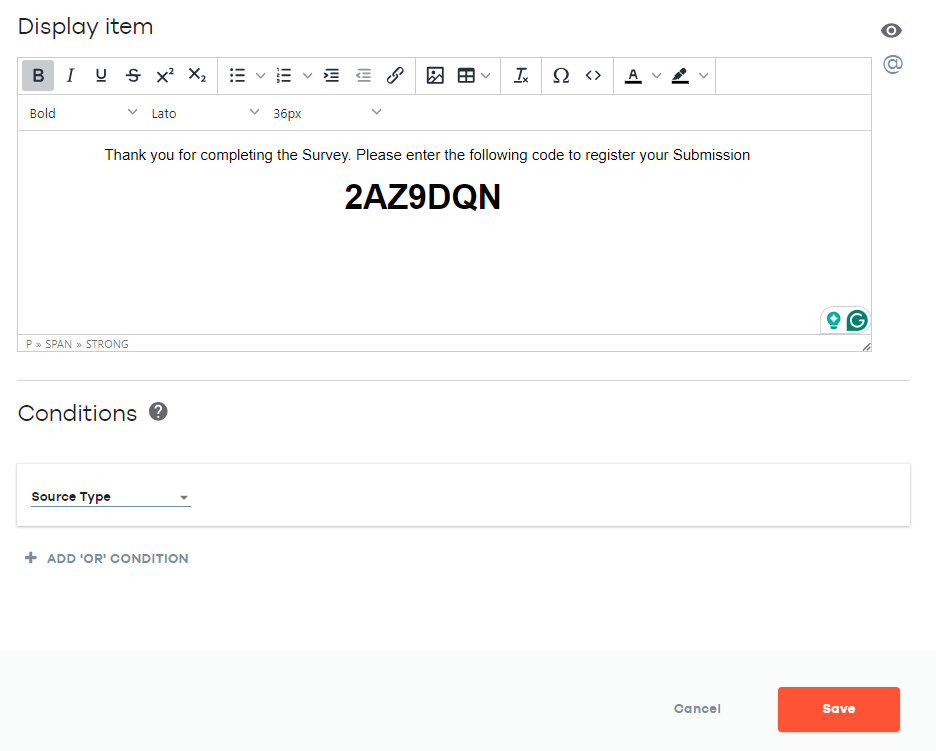
3. Giving participants a completion code to copy and paste
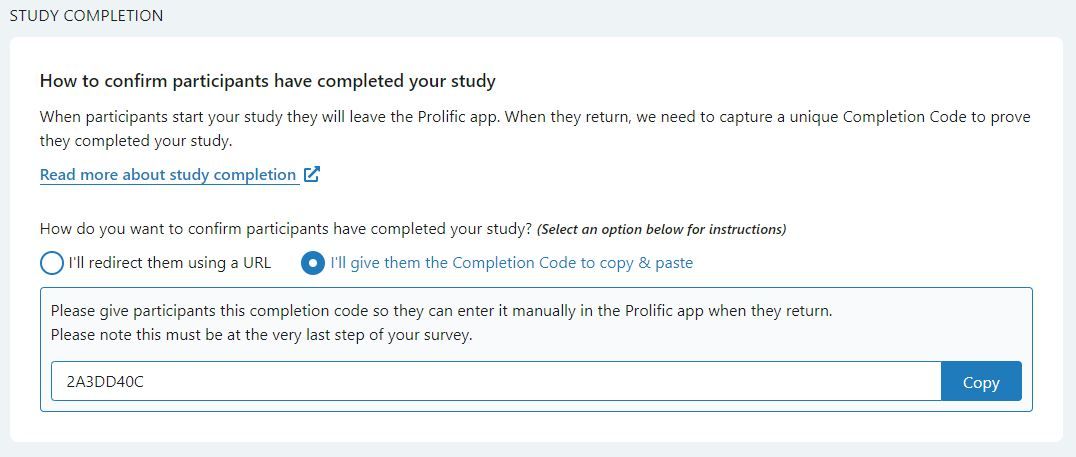
1. On Prolific, select 'I'll give them the Completion Code to copy & paste' in the 'Study completion' section of your study setup. Prolific then gives you a code to provide to participants:
2. Head to the completion page of the survey in Checkbox and click on “Add display item” option.
3. Enter your code along with the instructions and ask the participants to enter the code in Prolific.
Testing and Previewing your survey
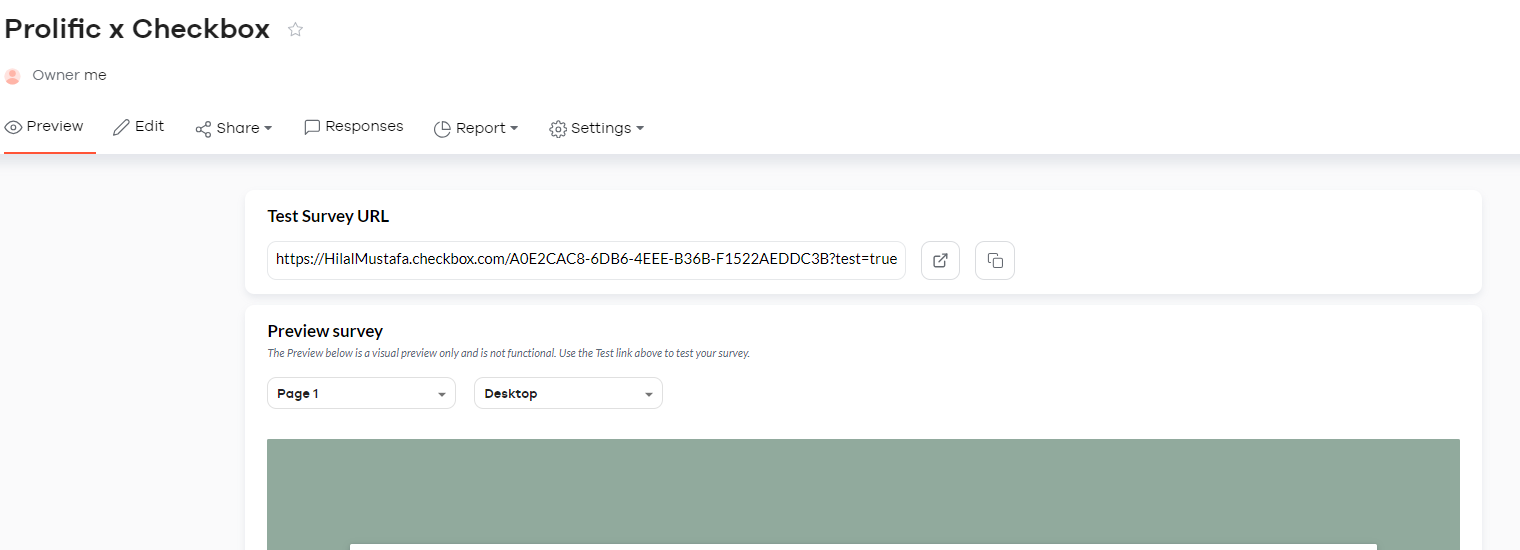
Checkbox allows the users to have the experience of how the survey would appear to their respondents, both logically and visually. Once the survey has been created, it can be tested by going to the Preview tab of the survey and from there opening the Test link that is available to test the survey. The test attempt would be exactly similar to the real attempt in terms of privacy control, survey logic and the visual representation of the survey items. It would also be able to trigger email alerts and notifications based on the configuration of the survey.
In addition to experiencing the test survey, the users can also preview their survey to see how the questions and the elements of the survey would visually appear to the respondents. This can be done by visiting the Preview tab of the survey.
